> ## Documentation Index
> Fetch the complete documentation index at: https://ampersand-24eb5c1a-odoo-deep.mintlify.site/llms.txt
> Use this file to discover all available pages before exploring further.
# Marketo
## Checklist before installing a Marketo integration
We recommend completing the following steps before installing the Marketo integration to ensure a smooth setup.
### 1. Create an API-Only Role
1. Log in to **Adobe Experience**.
2. Click on **Marketo Engage** and launch your instance.
3. At the top, navigate to **Admin**.
4. In the left sidebar, go to **Admin** → **Security** → **Users & Roles**.
5. Click on **Roles**, then **New Role**, and provide the API role name (used in Step 2).
6. Select the appropriate API access permissions for this role.\\
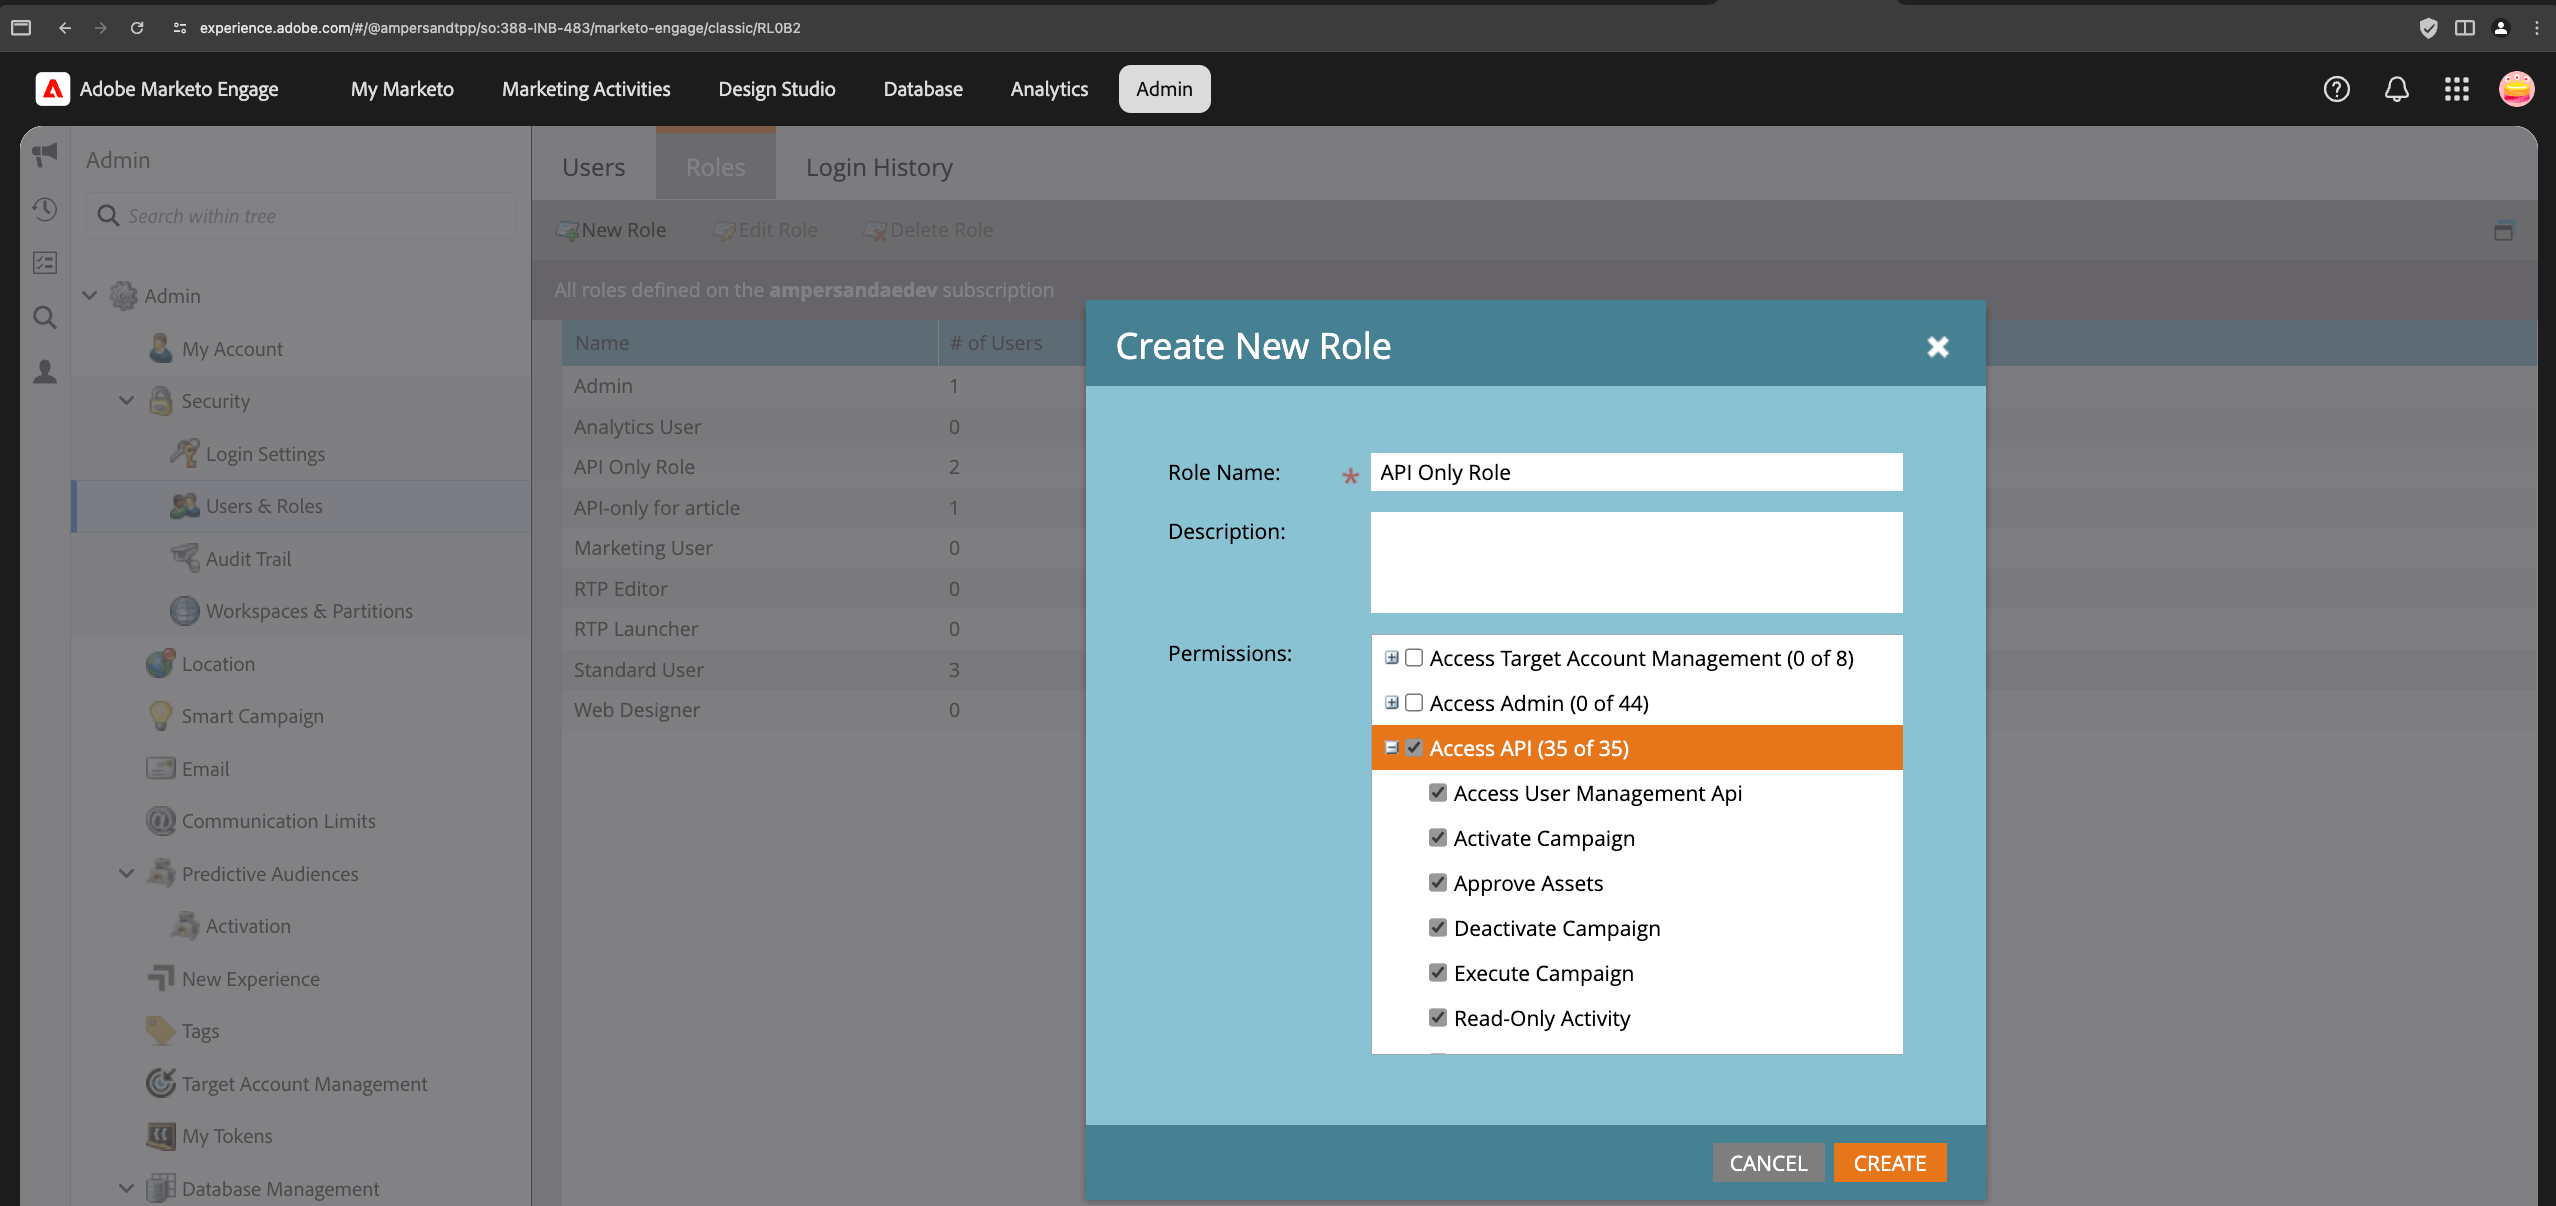 7. Click **Create**.
For more information, refer to [Marketo's official documentation](https://experienceleague.adobe.com/en/docs/marketo/using/product-docs/administration/users-and-roles/create-an-api-only-user-role).
### 2. Create an API-Only User
1. Log in to **Adobe Experience**.
2. Click on **Marketo Engage** and launch your instance.
3. At the top, navigate to **Admin**.
4. In the left sidebar, go to **Admin** → **Security** → **Users & Roles**.
5. Click on **Users**, then **Create API Only User**, and fill in the required details.
6. Under **Roles**, select the role created in Step 1.\\
7. Click **Create**.
For more information, refer to [Marketo's official documentation](https://experienceleague.adobe.com/en/docs/marketo/using/product-docs/administration/users-and-roles/create-an-api-only-user-role).
### 2. Create an API-Only User
1. Log in to **Adobe Experience**.
2. Click on **Marketo Engage** and launch your instance.
3. At the top, navigate to **Admin**.
4. In the left sidebar, go to **Admin** → **Security** → **Users & Roles**.
5. Click on **Users**, then **Create API Only User**, and fill in the required details.
6. Under **Roles**, select the role created in Step 1.\\
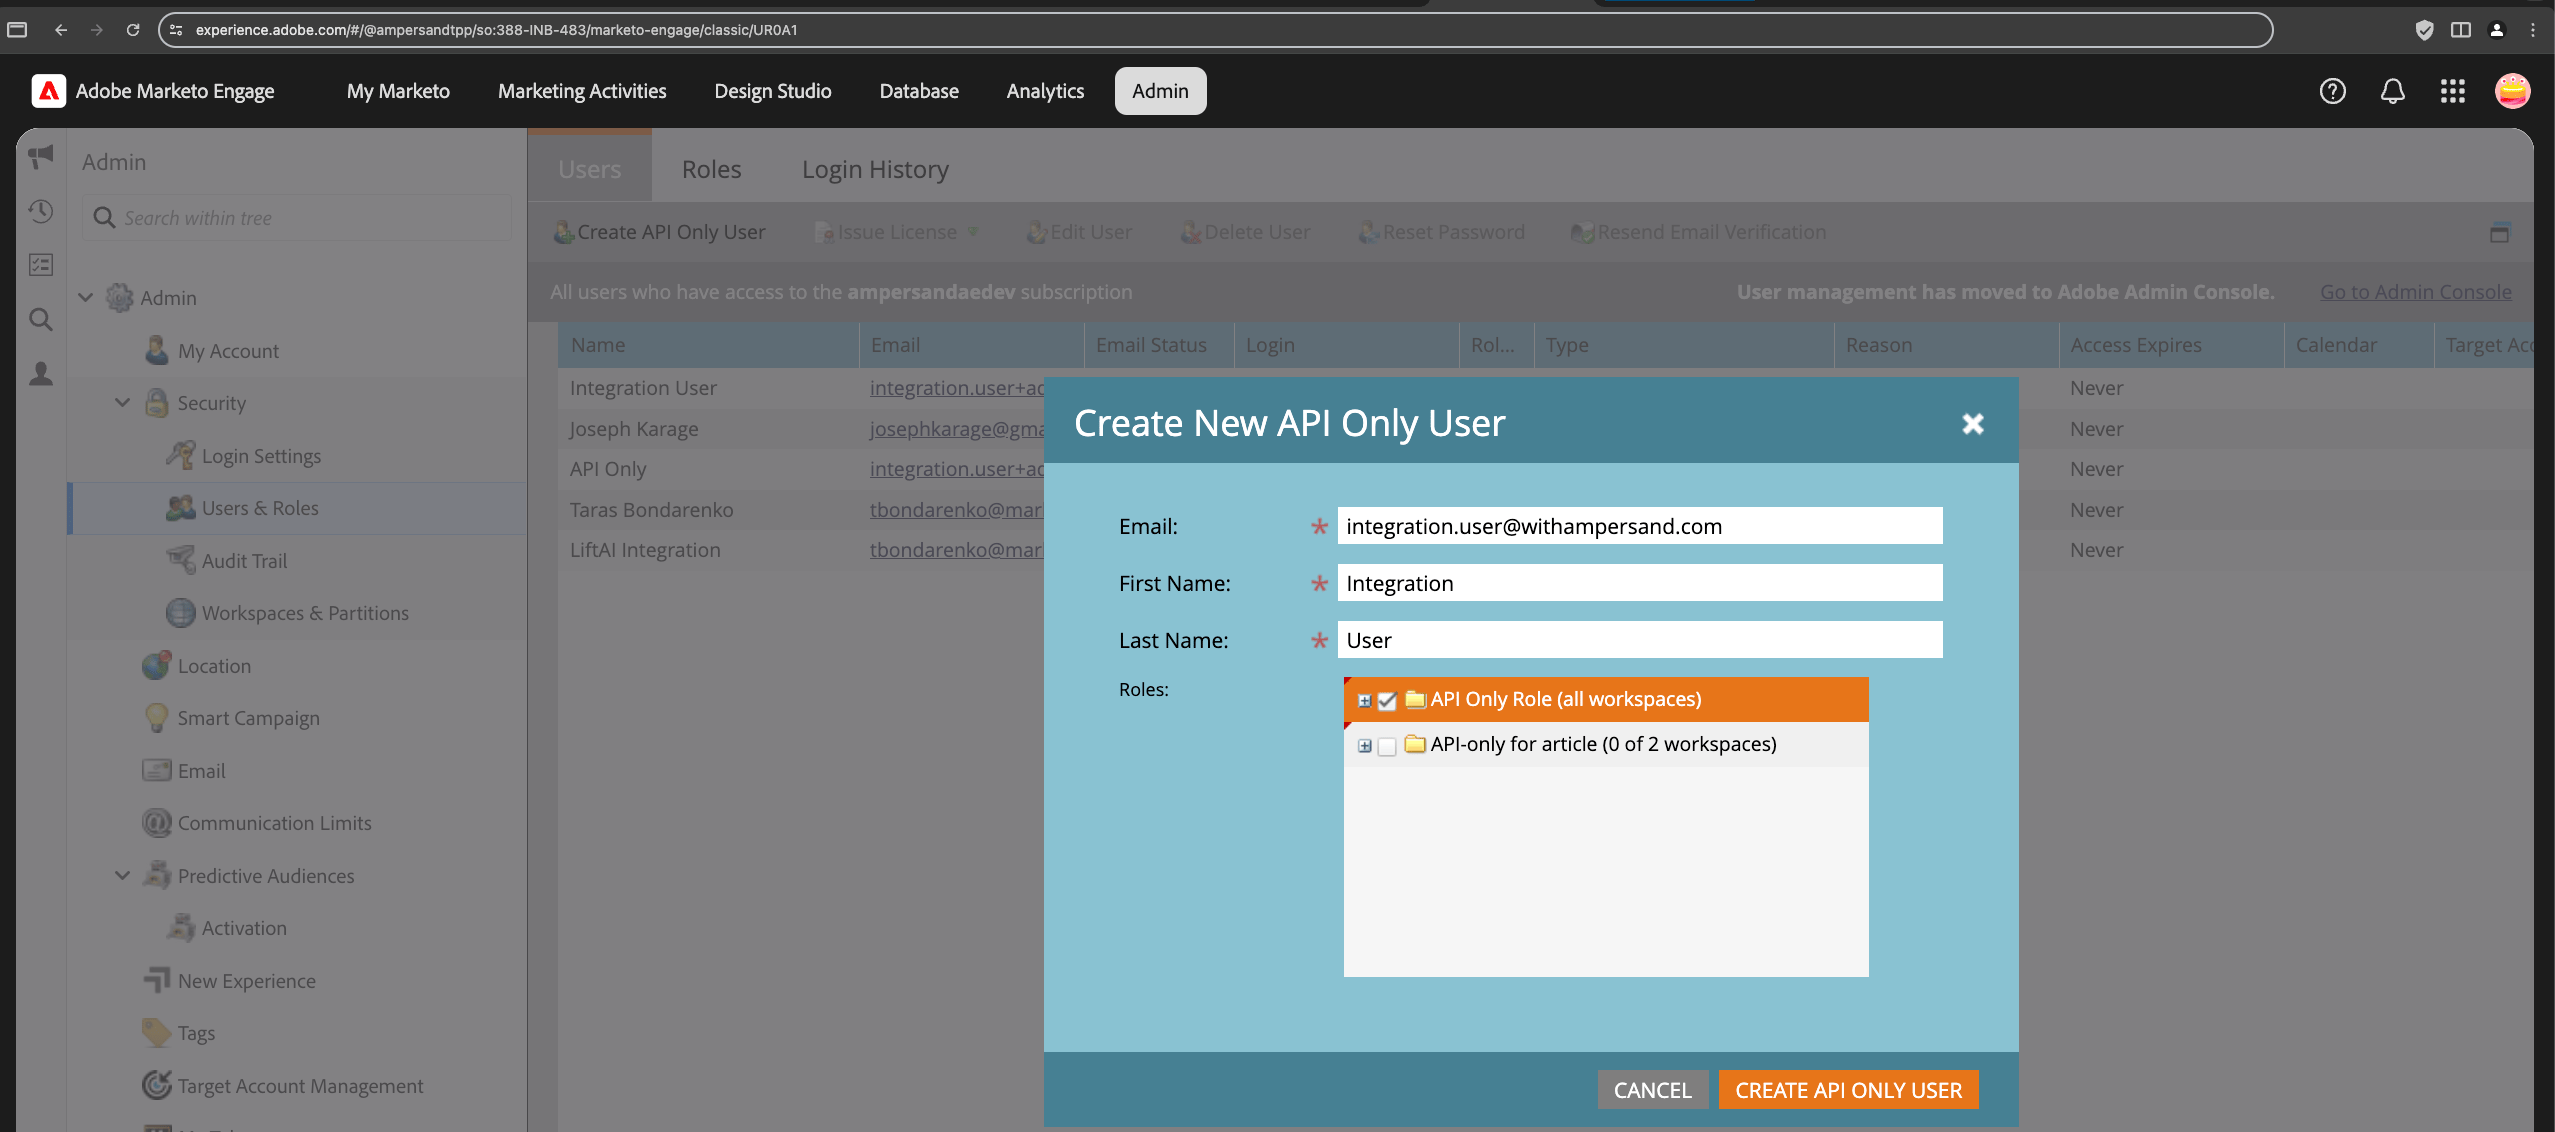 7. Click **Create**.
For more information, refer to [Marketo's official documentation](https://experienceleague.adobe.com/en/docs/marketo/using/product-docs/administration/users-and-roles/create-an-api-only-user).
### 3. Create a Custom Service
1. Log in to **Adobe Experience**.
2. Click on **Marketo Engage** and launch your instance.
3. At the top, navigate to **Admin**.
4. In the left sidebar, go to **Admin** → **Integration** → **LaunchPoint**.
5. Click on **New** → **New Service**, and provide the following details:
* **Display Name**: (Your preference)
* **Service**: Custom
* **Description**: (Your preference)
* **API Only User**: Select the user created in Step 2\\
7. Click **Create**.
For more information, refer to [Marketo's official documentation](https://experienceleague.adobe.com/en/docs/marketo/using/product-docs/administration/users-and-roles/create-an-api-only-user).
### 3. Create a Custom Service
1. Log in to **Adobe Experience**.
2. Click on **Marketo Engage** and launch your instance.
3. At the top, navigate to **Admin**.
4. In the left sidebar, go to **Admin** → **Integration** → **LaunchPoint**.
5. Click on **New** → **New Service**, and provide the following details:
* **Display Name**: (Your preference)
* **Service**: Custom
* **Description**: (Your preference)
* **API Only User**: Select the user created in Step 2\\
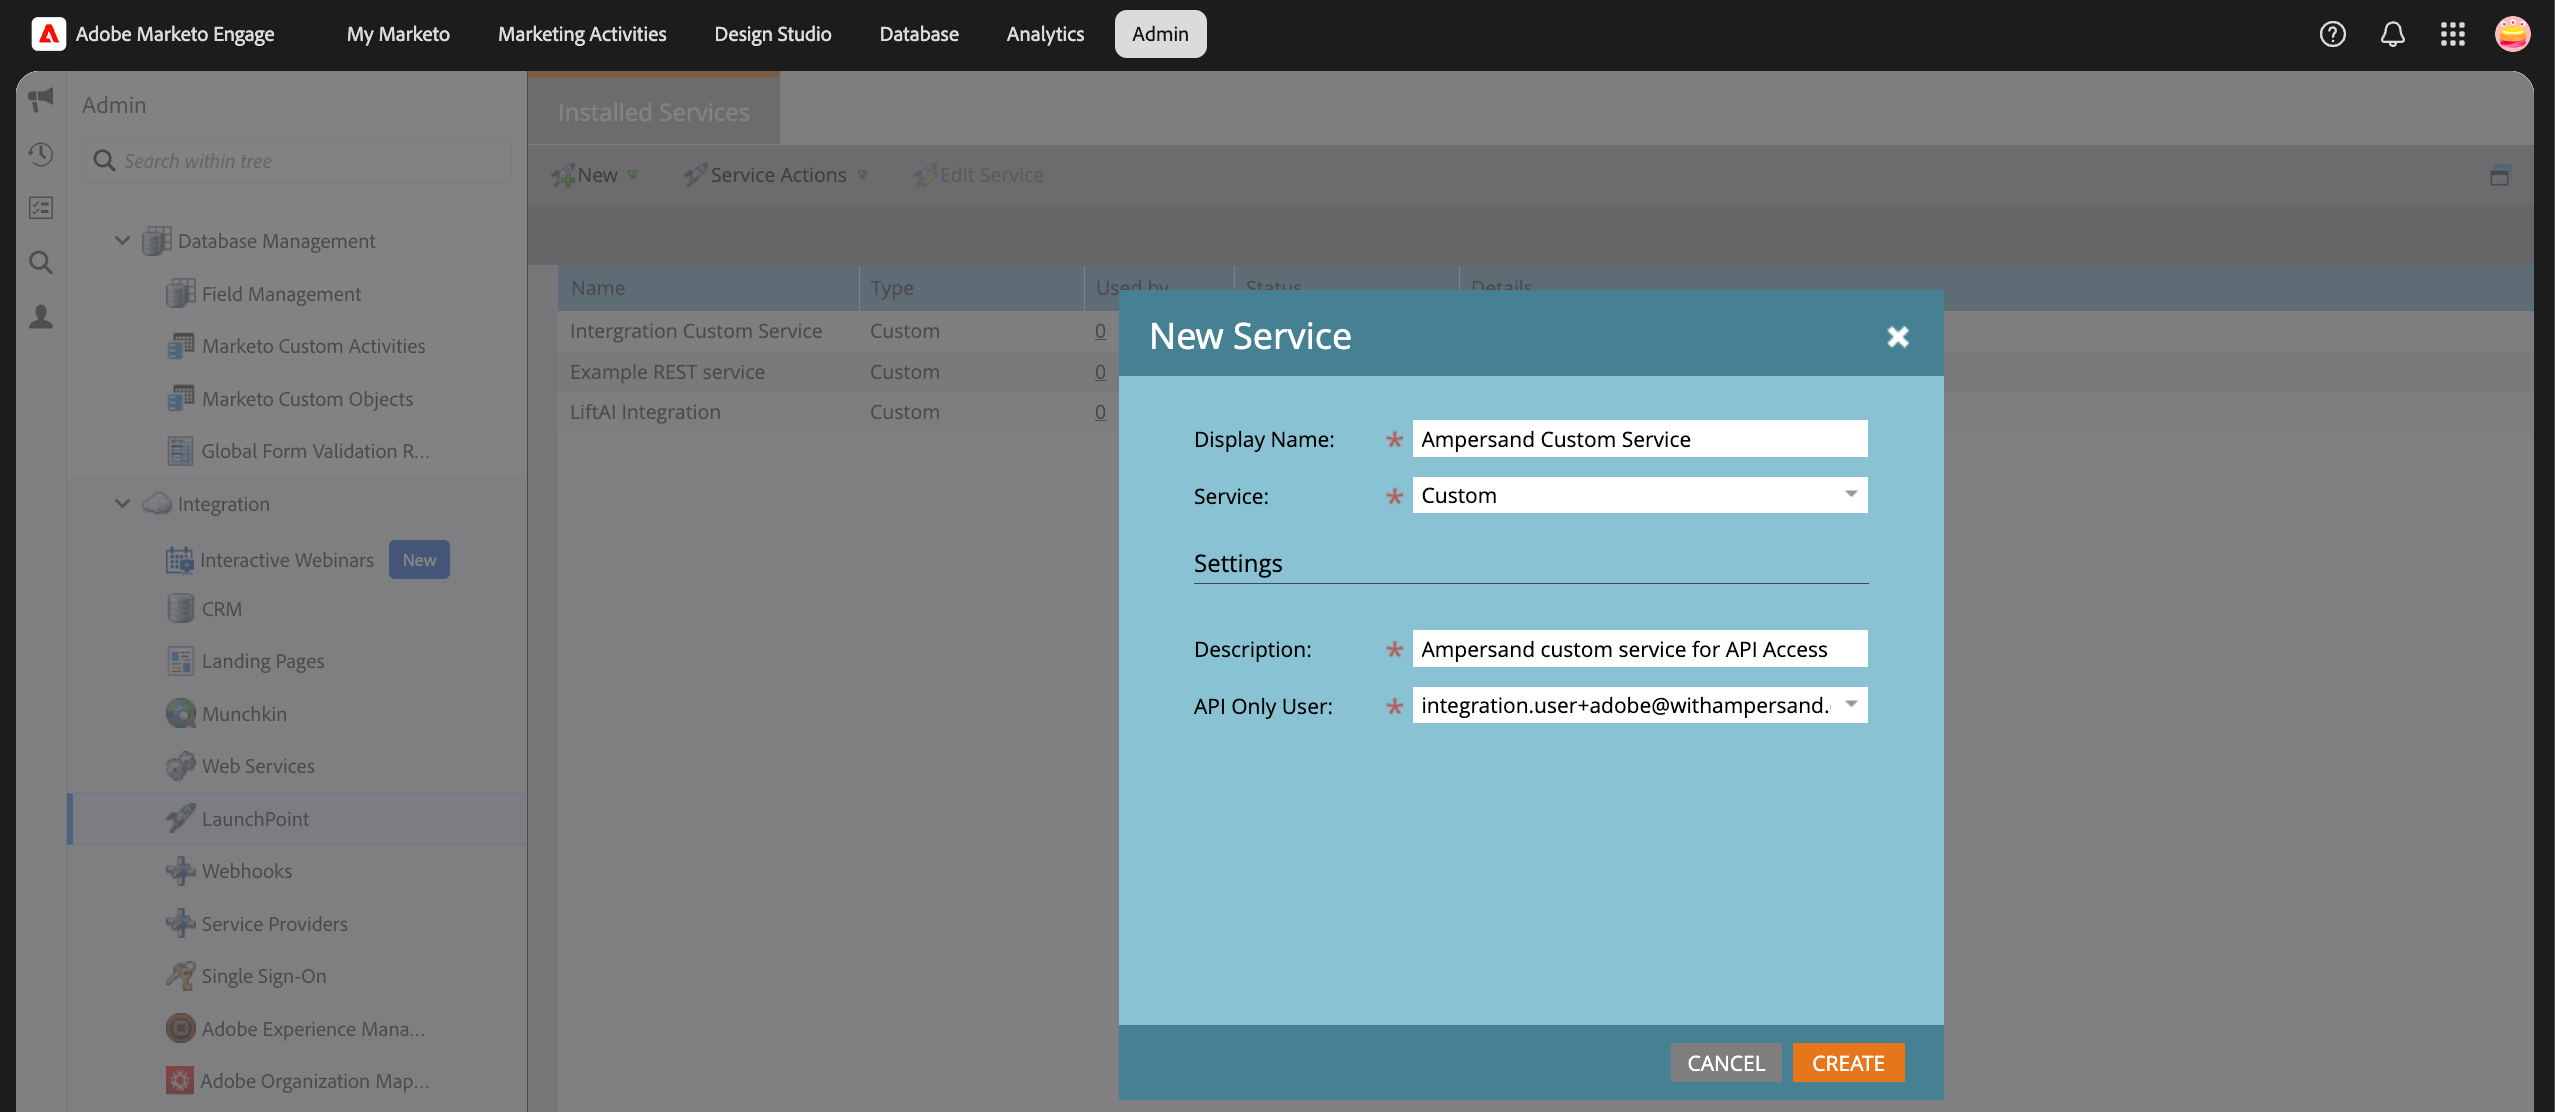 6. Click **Create**.
7. After creation, you can view the **Client ID** and **Client Secret** by clicking **View Details**.\\
6. Click **Create**.
7. After creation, you can view the **Client ID** and **Client Secret** by clicking **View Details**.\\
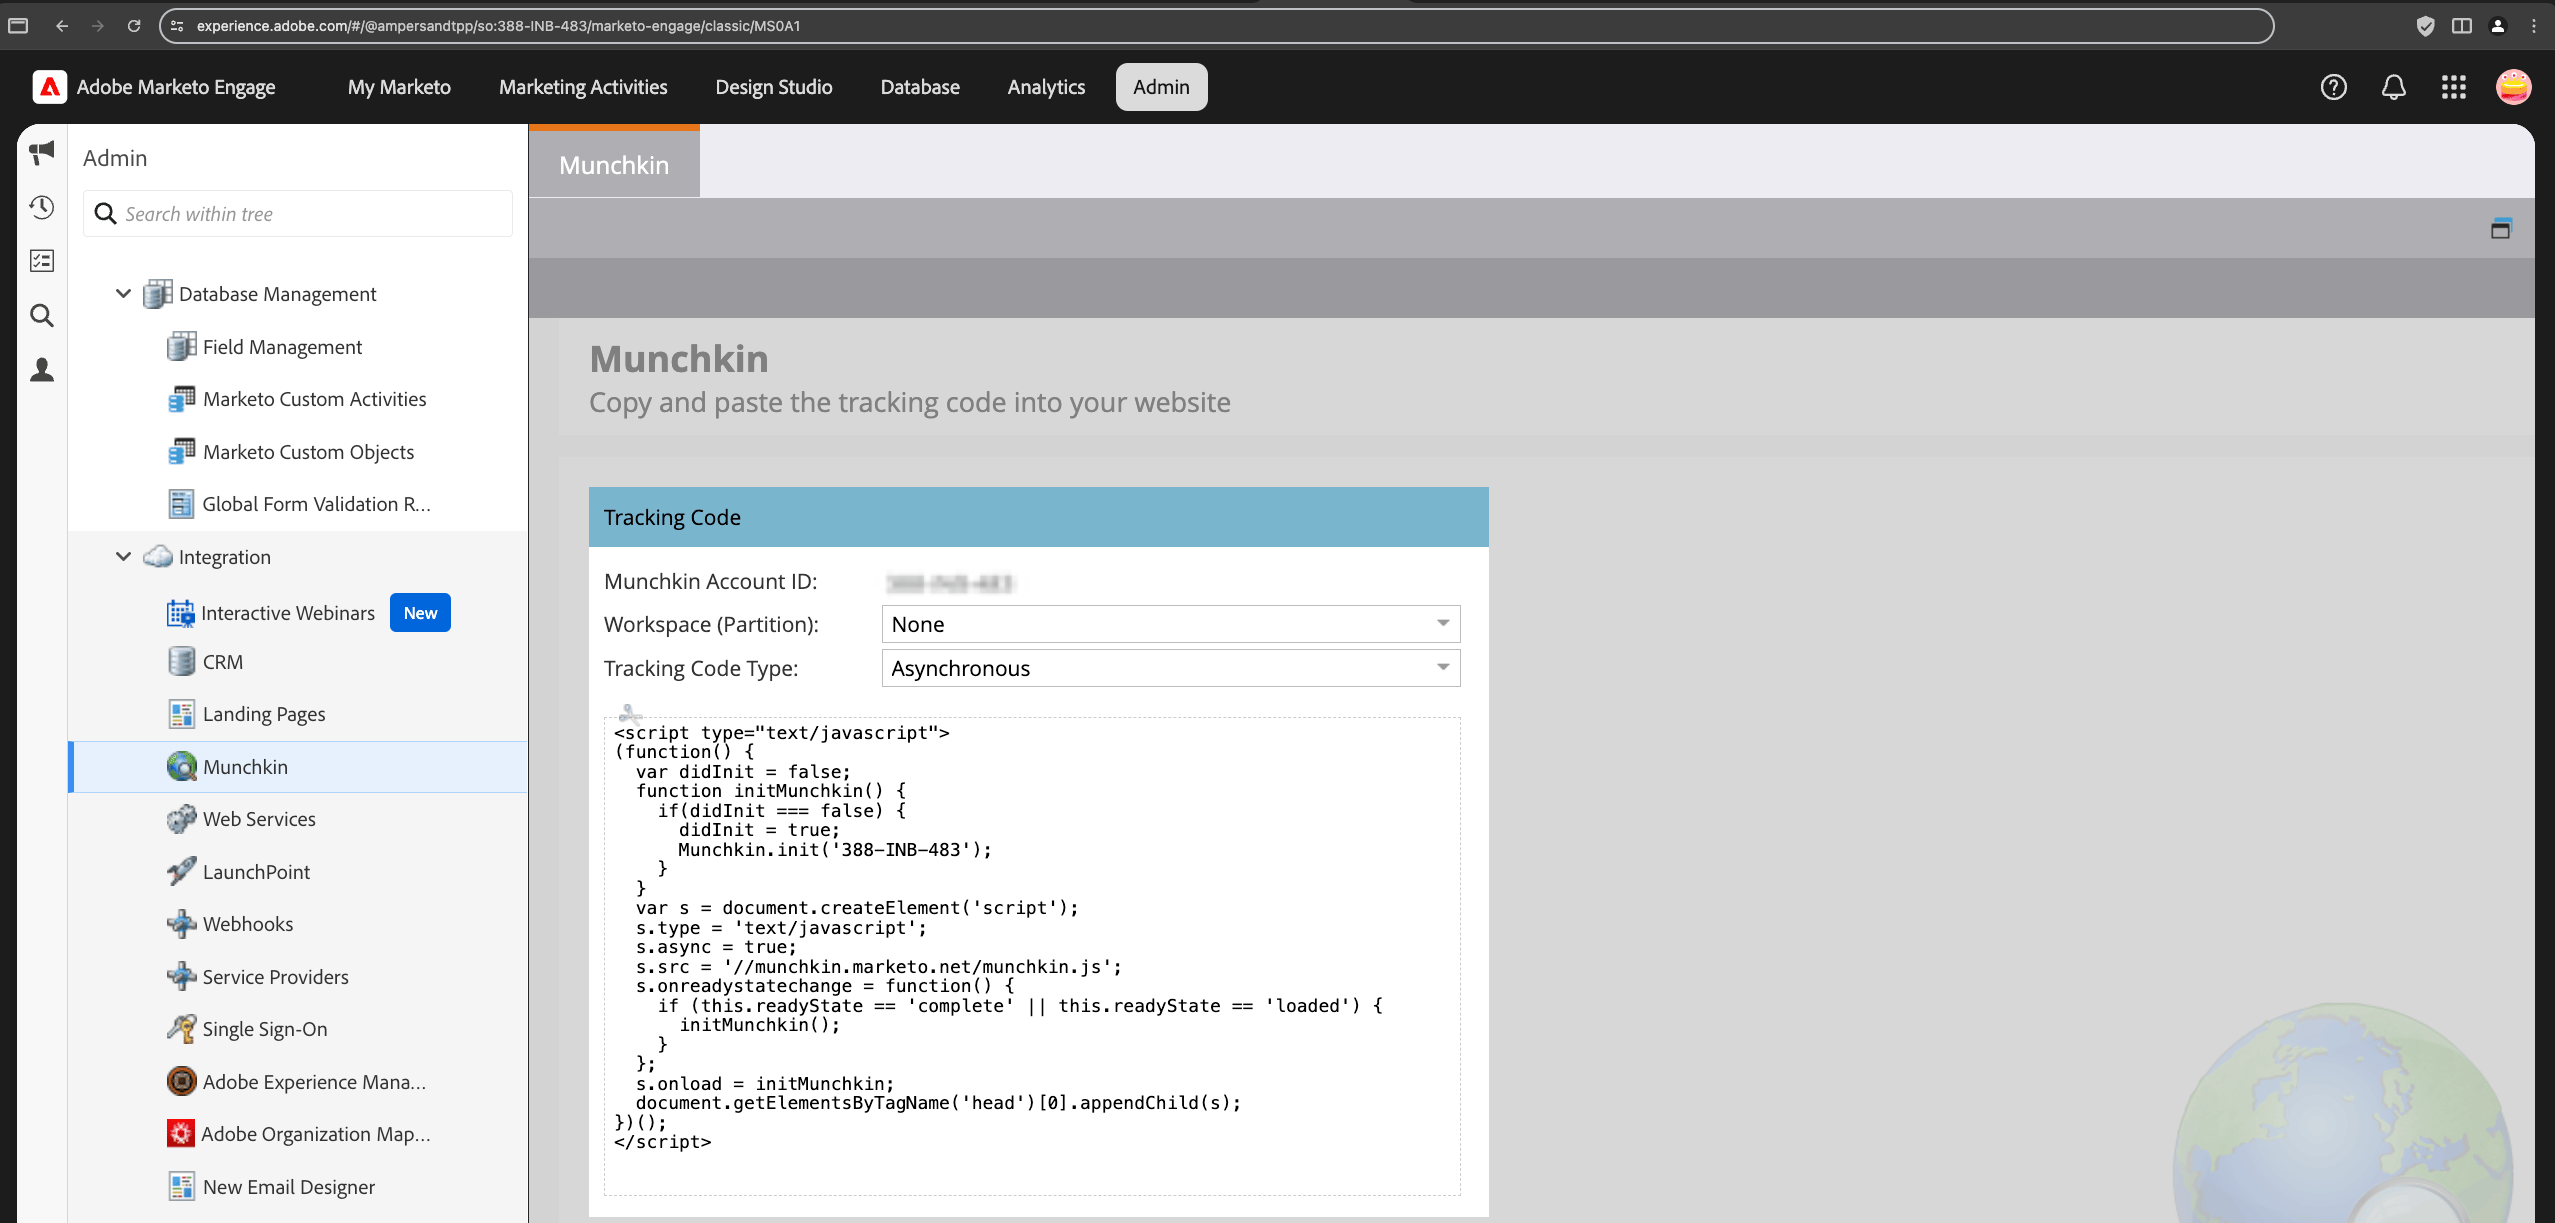
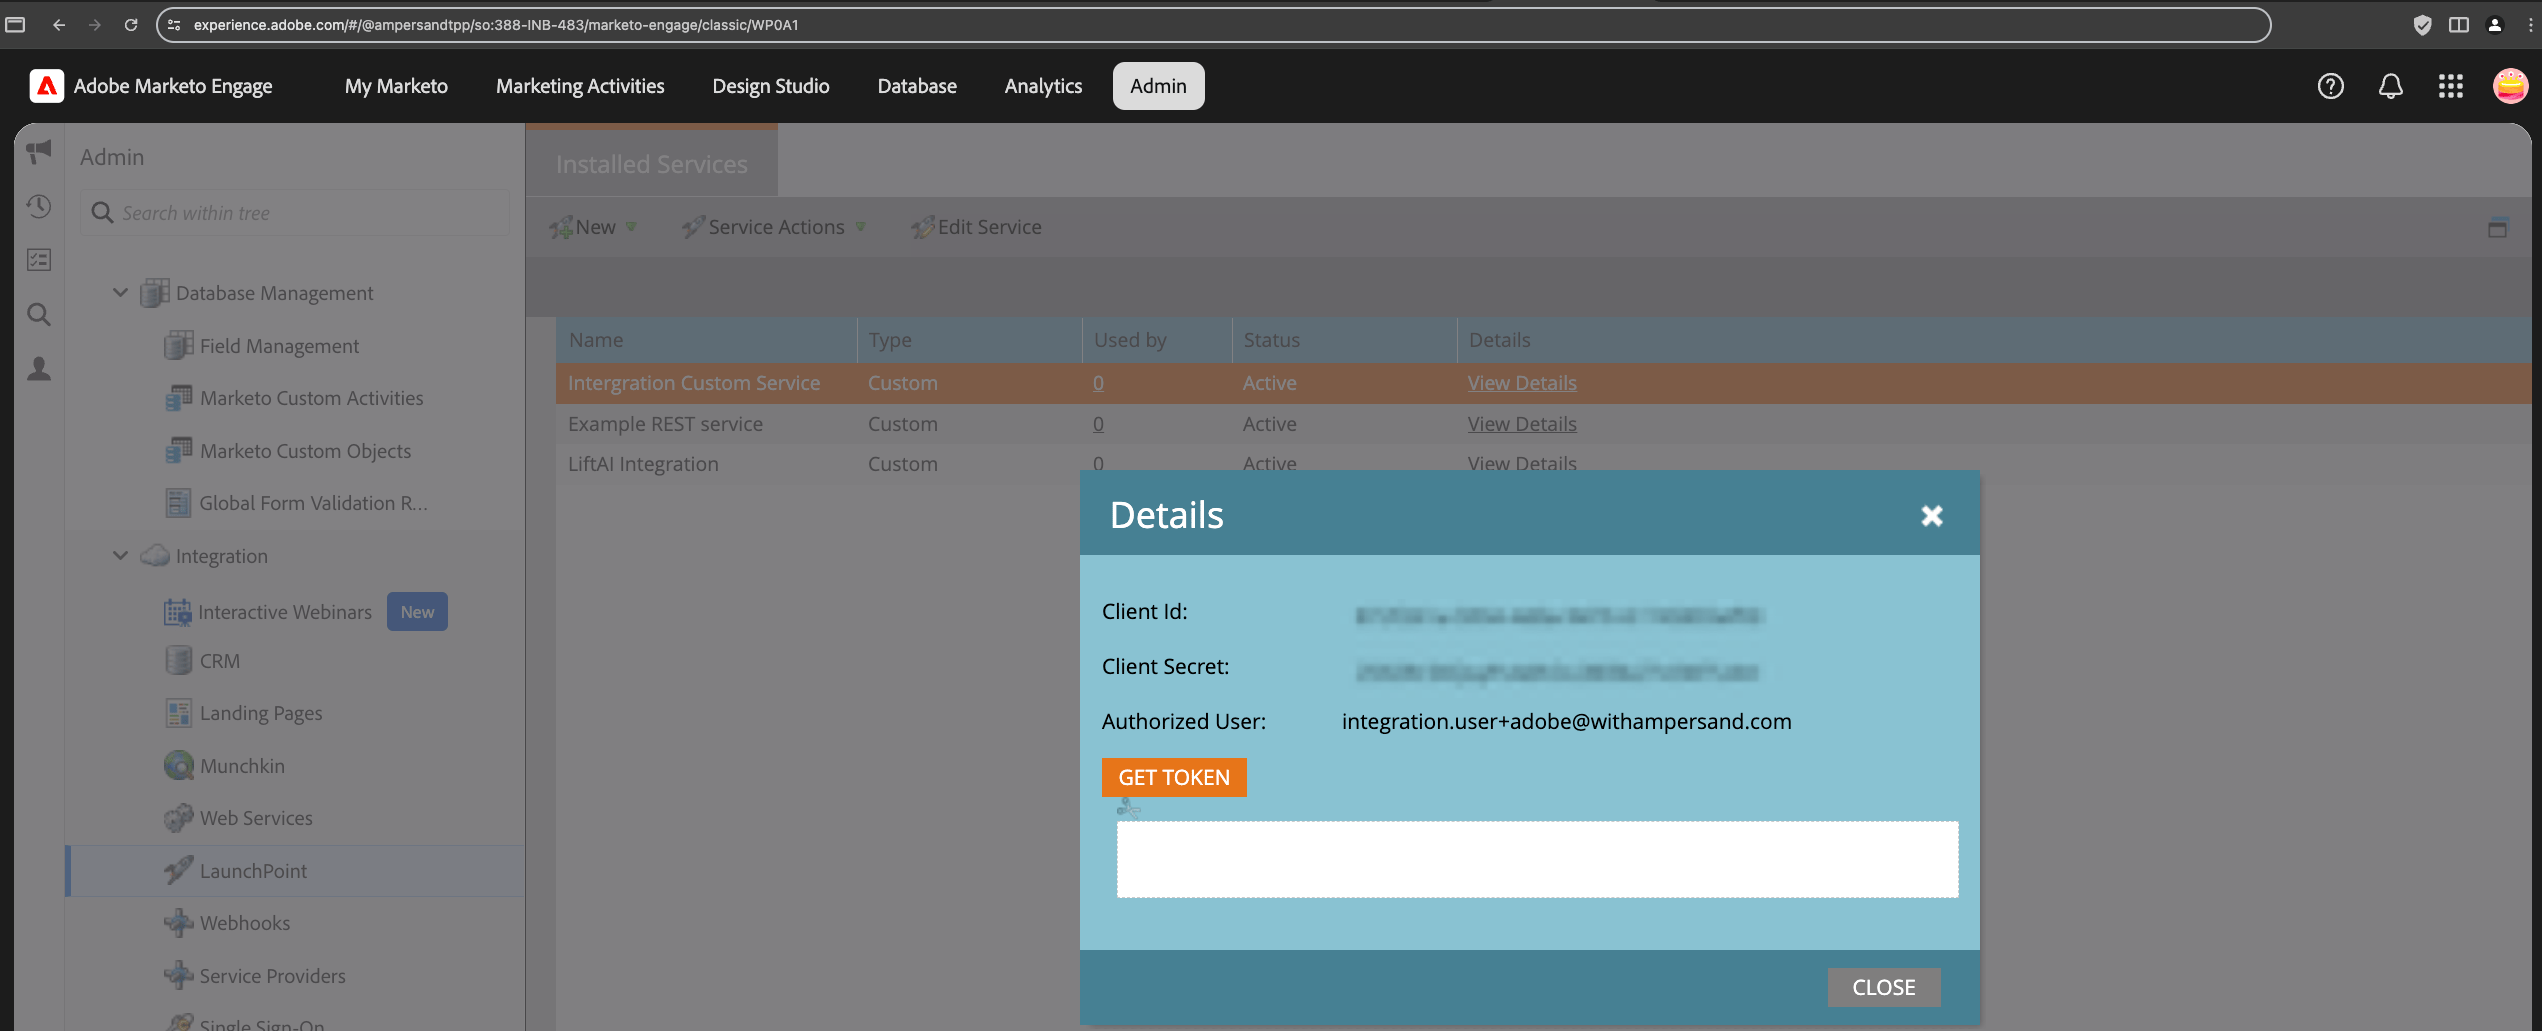 8. You will also need the `workspaceId` (Munchkin Account ID). This can be found under **Admin** → **Integration** → **Munchkin**.\\
 For more information, refer to [Marketo's official documentation](https://experienceleague.adobe.com/en/docs/marketo/using/product-docs/administration/additional-integrations/create-a-custom-service-for-use-with-rest-api#_blank).